Creating nutrient-rich compost is one of the most effective ways to ensure a healthy and productive garden. It all begins with nourishing the soil. The secret to achieving optimal plant growth lies in maintaining the right balance of organic matter. This article will guide you through the process of making high-quality compost and explain why it is essential for your garden.
The Importance of Good Soil
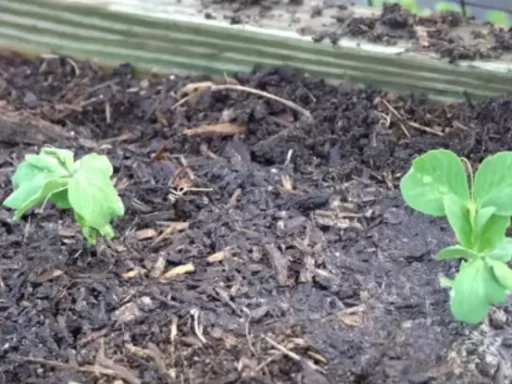
Soil quality is the foundation of successful gardening. Rich, well-nourished soil encourages robust plant growth, improves water retention, and enhances the structure of your garden bed. If the soil is healthy, everything else in your garden will fall into place. But how do you achieve this? The answer is compost—particularly compost you make at home.
Compost is not just a way to recycle garden and kitchen waste. It’s a crucial ingredient for healthy soil that adds vital nutrients to your plants. Homemade compost is rich in nitrogen, phosphorus, and potassium, all essential elements for thriving plant life.
What is Compost?
Compost is decomposed organic matter that enriches the soil with nutrients. When organic materials like vegetable scraps, leaves, and grass clippings break down, they form humus—a dark, crumbly substance that improves the soil’s structure and ability to hold moisture. Composting is nature’s way of recycling.
How to Make Compost: A Step-by-Step Guide
Step 1: Gather Your Materials
The first step in creating compost is gathering the right materials. You need two main types of compostable items: Browns and Greens.
- Browns: These are materials high in carbon. They include dry leaves, branches, twigs, straw, and paper.
- Greens: These materials are high in nitrogen, such as vegetable scraps, grass clippings, coffee grounds, and manure.
A well-balanced compost pile should consist of about two-thirds Browns and one-third Greens. This balance ensures that your compost breaks down properly and provides optimal nutrients.
Step 2: Start Your Compost Heap or Bin
Now that you have your materials, it’s time to start your compost pile. If you have a large garden, you can create an open compost heap. However, for smaller spaces, a compost bin is ideal.
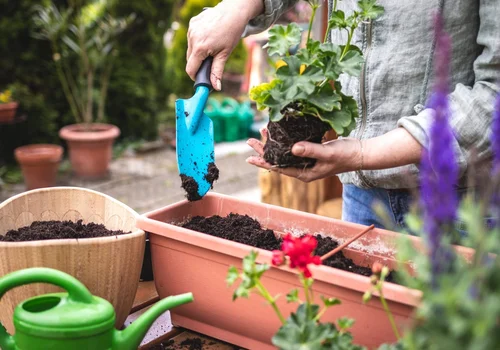
To begin, place your compost pile or bin directly on the soil. This allows microorganisms and worms to enter and help with the decomposition process. If you’re unable to place the compost on soil, don’t worry—nature finds its way, and the worms will make their way into the bin eventually.
Step 3: Layer Your Compost Pile
Layering your compost pile correctly is essential. Start with a layer of Browns at the bottom, which will help with drainage and airflow. Next, add a layer of Greens. Alternate between Browns and Greens, aiming for a balanced ratio. The Browns provide structure and aeration, while the Greens supply nitrogen.
If you’re worried about your compost getting too wet, add a layer of dry Browns like straw or shredded paper to absorb moisture. If it’s too dry, water it lightly to ensure everything breaks down properly.
Step 4: Maintain the Compost Pile
Maintaining your compost pile is key to speeding up the decomposition process. Turn the compost regularly to introduce oxygen, which helps microorganisms break down the materials faster. A well-oxygenated compost pile generates heat, indicating that the decomposition process is working.
You don’t need to turn the pile every day, but aim to mix it up at least once every few weeks. This helps ensure the pile remains evenly moist and full of air.
Step 5: Add Materials Regularly
Over time, continue adding Browns and Greens to your compost pile. Autumn leaves are a great source of Browns, while kitchen scraps and garden waste provide a constant supply of Greens. Adding a variety of materials ensures that your compost has a broad range of nutrients, which will ultimately benefit your plants.
If you want to speed up the process, you can add compost accelerators such as coffee grounds, wood ash, or even a bit of manure. These materials increase the nitrogen levels in your compost and help boost decomposition.
Step 6: Monitor Moisture Levels
Moisture is essential for composting, but it’s important to strike the right balance. A compost pile that’s too wet can become waterlogged and smelly, while a pile that’s too dry will decompose very slowly.
The best way to check if your compost has the right moisture level is to give it a squeeze. If water drips out, it’s too wet, and you should add some dry Browns. If it feels dry and crumbly, add some water to keep the process going.
Step 7: Let the Compost Mature
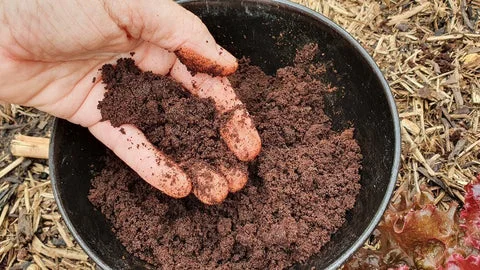
After several months, your compost will begin to break down into a rich, dark soil-like substance. This is a sign that it’s nearly ready to use. However, it’s best to let your compost mature for a few additional months to ensure all the materials have decomposed fully.
Once the compost is crumbly and smells like fresh earth, it’s ready to be added to your garden. Spread it over your garden beds or mix it into potting soil to provide your plants with a natural nutrient boost.
Composting Tips for Success
- Use the Right Materials: Always avoid adding meat, dairy, or oily foods to your compost pile, as these can attract pests and slow down the decomposition process.
- Keep a Good Balance: Strive for a 2:1 ratio of Browns to Greens to maintain a healthy compost pile.
- Turn the Pile Regularly: Aerating the compost is vital to keeping the process going. This also prevents the pile from becoming too compact.
- Be Patient: Composting takes time. It can take anywhere from three to six months to produce fully matured compost, depending on the materials used and the size of the pile.
Frequently Asked Questions About Composting
- How long does it take to make compost?
- It typically takes between three and six months for compost to fully break down, depending on the materials used and how often the pile is turned.
- What should not be put in compost?
- Avoid adding meat, dairy products, oily foods, and pet waste to your compost pile, as they can attract pests and slow down decomposition.
- Why is my compost pile not heating up?
- If your compost pile isn’t heating up, it could be too dry or lacking nitrogen-rich materials. Add some Greens and water to boost the process.
- Can I compost in winter?
- Yes, composting can continue through the winter, though it may slow down due to the colder temperatures. Insulating the pile with tarps or straw can help retain heat.
- What are the best materials to compost?
- Ideal materials include vegetable scraps, grass clippings, dry leaves, coffee grounds, shredded paper, and wood ash.
- Can I compost weeds?
- You can compost most weeds, but avoid adding weeds that have gone to seed or perennial weed roots, as these may survive the composting process.
- Do I need a compost bin?
- No, you can create a compost pile without a bin, but a bin helps keep the compost contained and insulated, which can speed up the process.