Bone meal is a hidden gem in the gardening world, a natural fertilizer that can double your fruit and vegetable production when used correctly. Whether you’re growing tomatoes, cucumbers, peppers, or fruit trees, bone meal can significantly increase your yield. In this article, we will explore how bone meal works, how to apply it, and why it is such an essential supplement for blooming plants.
What is Bone Meal and Why is It Beneficial?
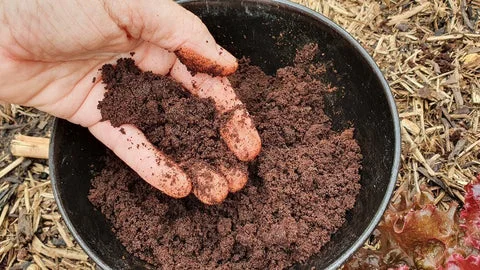
Bone meal is an organic fertilizer made from crushed animal bones, rich in phosphorus, a key nutrient that promotes root development, flower production, and fruit setting in plants. It is particularly beneficial for plants that produce fruit or flowers, as phosphorus is directly responsible for supporting the blooming process.
One of the unique properties of bone meal is its slow-release nature. Unlike synthetic fertilizers that provide an immediate but short-lived boost, bone meal slowly decomposes in the soil, providing a steady supply of phosphorus over time. This slow release allows plants to absorb the nutrient gradually, which enhances their overall health and productivity.
Understanding Fertilizer Labels: The NPK Ratio
Every fertilizer bag you purchase will display an NPK ratio on the front, representing the percentages of nitrogen (N), phosphorus (P), and potassium (K) in the product. Nitrogen promotes leafy green growth, phosphorus aids in root and bloom development, and potassium supports the plant’s overall metabolic functions.
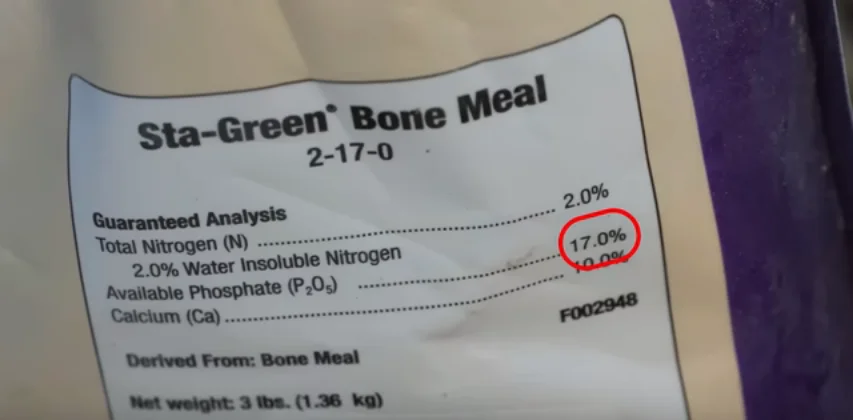
For gardeners looking to increase the production of fruiting vegetables or trees, phosphorus (the middle number in the NPK ratio) is crucial. Bone meal is a fantastic source of phosphorus, often containing up to 17% phosphorus by weight. Unlike synthetic fertilizers that can overwhelm the plant with a sudden nutrient surge, bone meal provides a consistent, slow-release of phosphorus, promoting healthy blooms and fruit sets over an extended period.
Myths Surrounding Phosphorus Supplementation
There are a few misconceptions about phosphorus fertilization that often discourage gardeners from using bone meal. Let’s debunk two of the most common myths:
Myth 1: Soil Tests Are Necessary Before Applying Phosphorus
Some argue that you shouldn’t apply phosphorus unless a soil test indicates a deficiency. While soil tests can be useful in large-scale farming operations, they are not always practical or necessary for home gardeners. Soil conditions vary across different parts of a garden, and vegetable gardens tend to deplete phosphorus over time. Even if a soil test shows adequate phosphorus levels, it may not be in a bioavailable form that plants can use.
Myth 2: Plants Don’t Need Much Phosphorus to Thrive
Another argument is that plants don’t require large amounts of phosphorus to survive. While it’s true that plants can survive on minimal phosphorus, the goal isn’t just survival—it’s thriving. Higher phosphorus levels allow plants to produce more flowers, resulting in higher yields. If you want your plants to produce abundantly, supplying them with enough phosphorus is essential.
How to Apply Bone Meal for Maximum Results

Now that we understand the benefits of bone meal, let’s dive into the proper way to apply it in your garden.
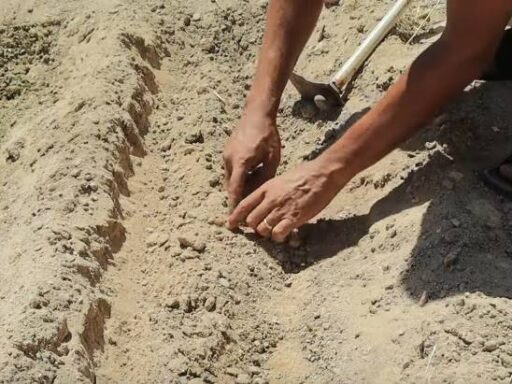
Step 1: Preparing the Planting Hole
When planting tomatoes or other fruiting plants, start by digging a deep hole. Tomatoes, in particular, have the unique ability to develop roots along their stems, so a deeper planting hole encourages a larger root system.
Step 2: Adding Bone Meal
Once you’ve prepared the planting hole, add two tablespoons of an all-purpose organic fertilizer, such as a 5-3-3 fertilizer, to the bottom of the hole. Then, dust the root ball of your plant with bone meal. This step is crucial because bone meal, being organic, requires soil microbiology to break it down into forms that plants can absorb.
Step 3: Backfill the Hole
Cover the root ball with soil and add more bone meal around the sides of the planting hole. Once the plant is halfway covered, press the soil down gently and sprinkle another small amount of bone meal around the plant. Finish backfilling the hole with soil, making sure to work the fertilizer into the soil for maximum effectiveness.
Step 4: Watering and Mulching
After planting, water the plant thoroughly. To minimize transplant shock, you can use a fish fertilizer like Alaska 5-1-1, which provides additional nutrients to help the plant settle into its new environment. Finally, reapply mulch around the plant to retain moisture and protect the roots.
Bone Meal Application Schedule
The frequency and amount of bone meal application depend on the type of plant you’re growing. For determinate plants like tomatoes, which grow to a specific height and then stop, you should discontinue fertilization once the plant has reached its full height and produced its final round of blooms. There’s no point in applying bone meal after this point, as the plant will not produce additional flowers or fruit.
For indeterminate plants, which continue growing and producing until the first frost, you should apply bone meal every two weeks. Use a scoop that holds about one and a half tablespoons and divide it between two plants, giving each plant around three-quarters of a tablespoon. Be sure to work the bone meal into the top inch of soil to ensure it breaks down properly.
Tailoring Your Fertilization Strategy
The timing of your fertilization should also take into account your local frost dates. For example, if your first frost is in mid-October and your plant takes two months to produce mature fruit, you should stop fertilizing in early August. This allows enough time for the final round of blooms to mature before the cold weather sets in.
Plants like cherry tomatoes, which produce smaller fruits more quickly, may benefit from fertilization later into the season, as they can ripen more rapidly than larger fruits.
Frequently Asked Questions About Bone Meal
- What is bone meal made from? Bone meal is made from ground animal bones, typically from cattle or fish, and is a rich source of phosphorus.
- Can I use bone meal on all plants? Bone meal is most beneficial for plants that bloom and produce fruit, such as tomatoes, peppers, and fruit trees. It is less effective for plants that do not flower.
- How often should I apply bone meal? For most plants, you can apply bone meal every two weeks during the growing season. However, stop applying once the plant has finished blooming or when your first frost date approaches.
- Is bone meal safe for organic gardening? Yes, bone meal is an organic fertilizer and is safe to use in organic gardening systems.
- Will bone meal harm my plants if I use too much? While bone meal is gentle and slow-releasing, it is possible to over-fertilize. Follow the recommended application rates to avoid nutrient imbalances.
- Can I mix bone meal with other fertilizers? Yes, bone meal can be used in combination with other organic fertilizers to provide a balanced nutrient mix for your plants.
- Does bone meal have an odor? Bone meal has a mild odor, but it is not overpowering. The smell typically fades once it is worked into the soil.